

Turn a
Turning a Pendant
These videos on using the Joyner Off Center Jig were recommended by customers.
Scroll to see a picture tutorial showing beginning steps using the jig.
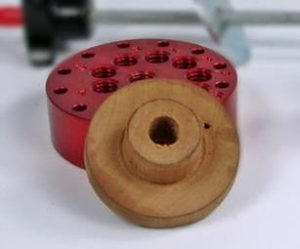
*note: the silver plates are the original and the red anodized are the new design.
This jig was designed by Richard Joyner in FL and is made in the USA.
#1 Video: Capt’n Eddie Castelin, well-known turner, adds tips.
#2 Video: Tom Stratton, England: Very well done with clear instructions for beginners.
#3 Video: Tim Rinehart: Good suggestions, Q&A, instructions on using the excel Spreadsheet.
Detailed Guide For The Joyner Off Center Jig
Intro Guide
Pendant
Pattern Design
If you find any other good videos on using any of my products that you think others would enjoy, please let me know.
Basic Instructions for Joyner Off Center Jig
 |
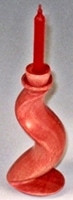
For Bottle Stoppers and KnobsCut waste block so there will be 1/2″ of the bolt sticking up the top and make the diameter so you can see indexing holes in plate. You can turn the center to diameter of stopper or ?? Drill a 5/16” hole. |
 |
Insert the bolt in the bottom of the index plate and thread the waste block on to the bolt as tight as you can get it. If there is any movement, put a wood screw or two in the countersunk holes in the index plate to keep the waste block from moving when you are turning. |
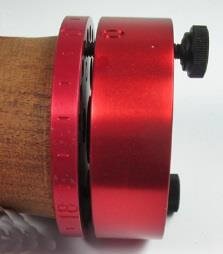 |
Be sure the numbers are on the bottom (not between plates) and line up the 0 on the two plates then thread in the thumb screws to hold the plates together.Use all 4 when turning a knob, goblet, stopper or anything between centers. You can use 2 or 3 if doing a pendant as all the turning will be on the flat surface and you will be pushing toward the headstock. |
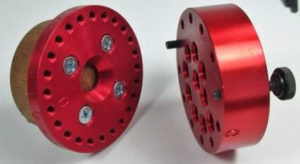 |
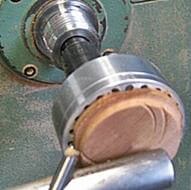
For PendantsUse a solid waste block, be sure you can see the index holes around the perimeter. Thread 4 wood screws into the wood to hold it, then put the 2 plates together with the thumb screws, again lining up the 0 on both plates. Insert the mandrel in the center hole, put it in the lathe and make sure the top of the waste block is smooth and a tiny concave. |
 |
I like to make a few cuts on what will be the back of the pendant, then part off at least a 3/8” disc. With double-faced tape, press the disc to the waste block. |
 |
I bring up the empty tailstock to get good pressure on the disc to the tape to the wasteblock.The best double-faced tape is the blue duct tape at Home Depot in the paint department. (jig picture is old version not anodized red). |
 |
Depending on which hole you thread the mandrel into will determine the cut you will get. |
  |
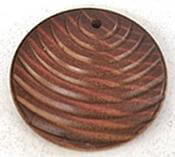
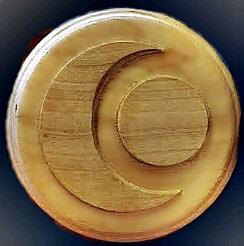
As you turn, you will be cutting “air” so be sure to hold the tool steady. I use either a small skew on its side or an 1/8” detail gouge. If you keep taking the same cut but moving the tool, you get a whole new design.The first shows only moving the tool and the “moon” design is done by removing wood around the design; again my moving the tool (this take a little practice.)
   |
| Put a piece of paper on the waste block and use a marker to show the cut with the mandrel in each hole. Be sure to write the number of the off-set hole because you will not remember! I used a separate sheet for each and put them in a notebook. The diameter of your piece will change the cut a little so turning the lathe by hand, make a pencil to show the cut before cutting a beautiful piece of wood. |
Tip: Tape a piece of paper to the index plate, use a pen to show where the cuts will be then write the number of the hole where you put the mandrel on that line. You will have samples of the cuts produced by each hole. You can combine off-sets with the indexing to produce thousands of variations. I do this on scrap pieces of wood and have them on a board with the numbers of the off-set hole written beneath them.
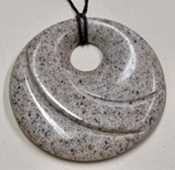
Corian pendant done |
To do this swirl effect, leave the mandrel in |
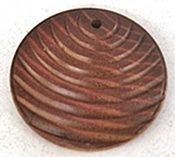
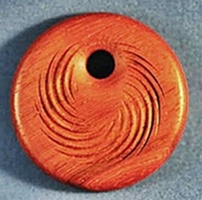
Making a lot of cuts evenly spaced on straight grained wood |
“Bear” Limvere |

Paint the wood, then cut to get a whole new look. |
Once you make your first off-center item, you will see how easy it is and your imagination will take over from there!